The Pink Leaf Scrapbooking Guide

The Pink Leaf Scrapbooking Guide

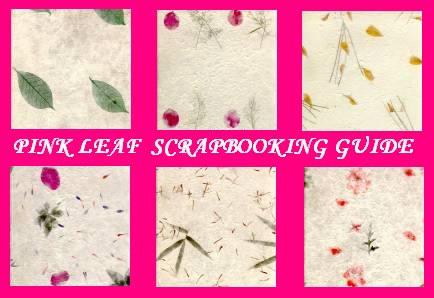
An online scrapbooking magazine that will give you cool ideas and designs to jazz up your scrapbook pages.


MY SCRAPBOOK PAGE: A GRAND PRIZE WINNER
(SCRAP-A-PAGE: ADULT DIVISION)
SCRAPPIN' MANIA by ALL ABOUT SCRAPBOOKING
JUNE 17, 2006
ROBINSON'S PLACE ERMITA


JAC'S 19TH BIRTHDAY PARTY
JULY 7, 2002; MDR DORM
It was my LAST birthday as a teenager,
and though it was raining hard outside,
we still had a lot of FUN!


THE GRAND PRIZE
Go to Brown Eyes for the story and list of prizes.
Happy Scrapbooking!!!

Tuesday, January 19, 2010

Kikay Crafts on Etsy

Wednesday, May 31, 2006

IT'S A GIRL!

Here are some of the layouts I've created for a baby girl's scrapbook page. I've used All About Scrapbooking materials for these layouts.


NEWBORN PHOTOGRAPHY TIPS

Many parents say that one of their biggest regrets is not having taken enough photos of their children as infants. It's understandable. The first few weeks at home with a new baby are a blur and all about the basics -- eating, bathing, sleeping -- for both of you. But time fliesm and before you know it, that tiny 6-week old is celebrating her third birthday. Here are few tips for getting terrific photos of your little one while she's still in that sweet newborn stage.

KEEP BATTERIES AND FILM in your camera at all times. Great photo opportunities happen when you least expect them. Take a lot of pictures: The more you take, the better your chances of capturing that perfect shot.

USE NATURAL LIGHT whenever possible because babies are sensitive to bright lights. Close the window or outside under a shade tree is a perfect location.

IF YOU MUST USE A FLASH, bounce it off reflective surface, such as a ceiling, a wall or a piece of foam-core board, and use room light to enhance the scene,

AVOID UNNATURAL POSES if you can -- they will likely look as staged as they are. Babies can't be posed easily, so you'll have to take photos of them as they are. Palce a blanket in a carrier and photograph a newborn sitting in that, or use a pillow to prop up the baby.

GET ON BABY"S EYE LEVEL AND GET PERSONAL. Fill the frame by zooming in. If the baby is lying down, try to take photos at both 45 and 90 degree angles. Place the newborn on his back and stand over him, photographing directly down.

CAPTURE ALL OF YOUR NEWBORN'S MOODS. Don't wait for a perfect smile. Years later, some of your favorite pictures are likely to be thjose of your baby crying, yawning, sneezing, or frowning.

TAKE PHOTOS OF ALL THE BABY PARTS: the rolls on their legs, their bald little heads, and their tiny hands and feet.

KEEP THE BACKGROUND SIMPLE. A soft blanket or sheet in a light or dark color is perfect. also keep Baby's clothes simple and comfy.

BE PATIENT. Photos need to be taken on the baby's schedule. Plan photos to avoid feeding and fussy times. A sleeping baby is very photogenic.

CAPTURE PHOTOS OF TEH NEWBORN WITH OTHERS, such as grandparents, Mom, Dad, siblings, and family friends, to document those relationships.


-by Tracy Kyle

Reference: Scrapbook Etc.

CARD ALBUM

1. Choose an album. Be sure to select onethat's large enough to hold a standard-sized greeting card.

2. Create pockets for the inside of your album by scoring and folding cardstock or by stapling wide strips of fabric and/or sheets of decorative-edged cardstock to each page.

3. If desired, leave blank apces where the album recipient can insert her own photographs.

4. Embellish pages as desired with ribbons, stickers, rubber stamps, lace photo corners and more.

5. Decorate the album cover with paints, charms, ribbons, labels and other accent.


Reference: Creating Keepsakes

GIFT BOX ALBUM

1. Choose an empty box with a lid.

2. Cover the box with patterned paper and embellish with matching accents.

3. Measure the inside of the box.

4. Cut cardstock slightly smaller than the inside of the box. The cardstock will become the "pages" in your album.

5. Hook pages together with hinges, grommets or ribbons. Decorate pages as desired.

6. Glue the back of the last page into the bottom half of your box.

7. Carefully fold your pages into place.

8. Put lid back on box; tie with ribbon.


Reference: Creating Keepsakes